Connect with us!
Running HTML using Live server in Visual Studio Code Editor
In this article we will see the step by step procedure on how to download, install VS code for running HTML using Live server extension and also how to create your first website using HTML. Let’s get started.
Table of Contents
Installing Visual Studio Code
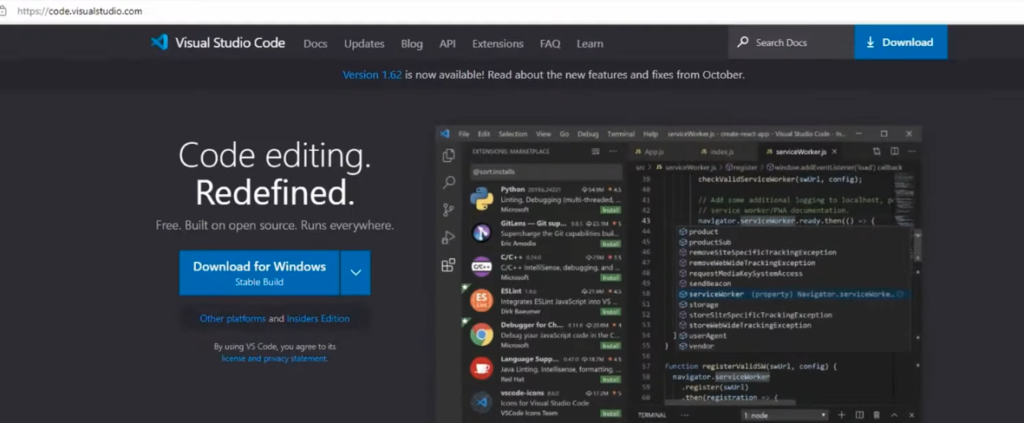
Firstly we need to install visual studio code editor. For that go to code.visualstudio.com official website. Click on Download for Windows button and it will start to download VS code.
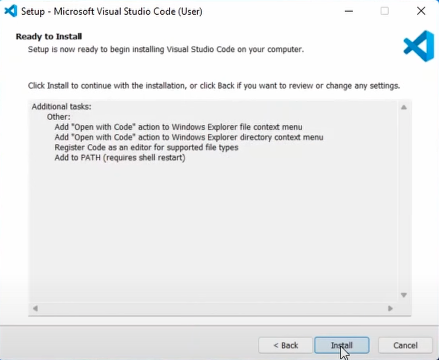
Once the download is completed, the installation wizard will pop up. Use the default settings and start to install the VS code.
Introduction to Visual Studio Code Editor
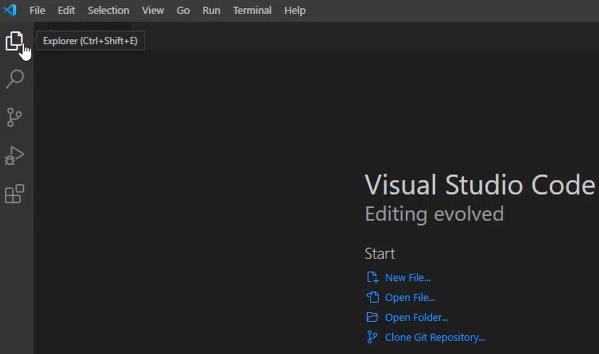
Go to Left side panel you will see the first tab is the explorer tab which can help you to open an existing folder , directory or create your own folder.
The second is search tab where you can search for files or string inside a file.
The third is source control tab which helps us to clone a project from any version control.
The fourth is the run and debug tab which allows us to run the program and set break points in the code for debugging
Fifth is extension tab which is used to download the plugins that’s used in VS code.
Install Live Server Plugins
We need to download Live server plugin by clicking the extensions tab on the left panel. This will help us to render our HTML page on the browser.

How to Create a new Project in Visual Studio Code
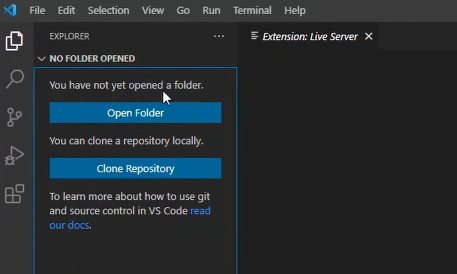
To create a new project go to the explorer tab and click on open folder. Choose an empty folder and name it as HTML project.
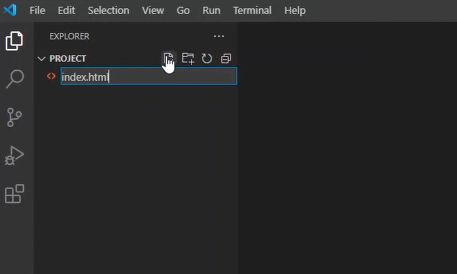
Now create a new file and name it as index.html
VS code has intellisense which helps to auto complete the code.
Type in “!” and press enter, you will see the started code coming up automatically.

<!DOCTYPE html>
<html lang="en">
<head>
  <meta charset="UTF-8">
  <meta http-equiv="X-UA-Compatible" content="IE=edge">
  <meta name="viewport" content="width=device-width, initial-scale=1.0">
  <title>Document</title>
</head>
<body>

</body>
</html>
Let try to add heading to the code <h1> This is my first website! </h1>.
<!DOCTYPE html>
<html lang="en">
<head>
  <meta charset="UTF-8">
  <meta http-equiv="X-UA-Compatible" content="IE=edge">
  <meta name="viewport" content="width=device-width, initial-scale=1.0">
  <title>Document</title>
</head>
<body>
  <h1> This is my first website! </h1>
</body>
</html>
Running HTML page in Visual Studio code using Live server
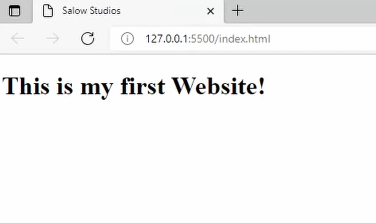
To run this code right click and select open with Live server option. Now we have successfully created our first HTML page.
Running HTML using Live server Video Tutorial
Thank you for reading this article . Hope it was helpful. Happy coding!


